July 31, 2017
I’ll assume that the basics of creating an angular project and creating components is known; so I’ll start this tutorial from the typescript file within the component. For ease of reference, this component is named sandbox .
In the template tag, I have created the element on which the mouse over event will be detected. This can be any visible element; but for this tutorial, I’m using a button.
Within the button tag, I use the attribute corresponding to the mouse event. In this case, it’s (mouseover), passing in the ($event) variable. I have included a screenshot of this button declaration below.

For the other available mouse events, all that’s needed is to replace the attribute that declares the mouse event. For example, when using a double click event, you’d want to replace mouseover with dblclick .
Once defining the element that will be used for interactivity, you can create the function that it is referencing. In this case, the function being called is fireEvent() , and the variable ($event) is being passed in. So below the @Component({ }) function, I create a function named fireEvent() and just pass in (e).
This variable being passed in doesn’t really matter, it’s essentially only referencing the current element anyway. Anything in this function will be run when hovering the mouse over the button. For example purposes, I will just output the type of event to the console, using a console.log command, and passing in the type of the element that is calling the function, like so: console.log(e.type)

Now all that needs to be done is referencing this component in the app.component.html file, and it will display.
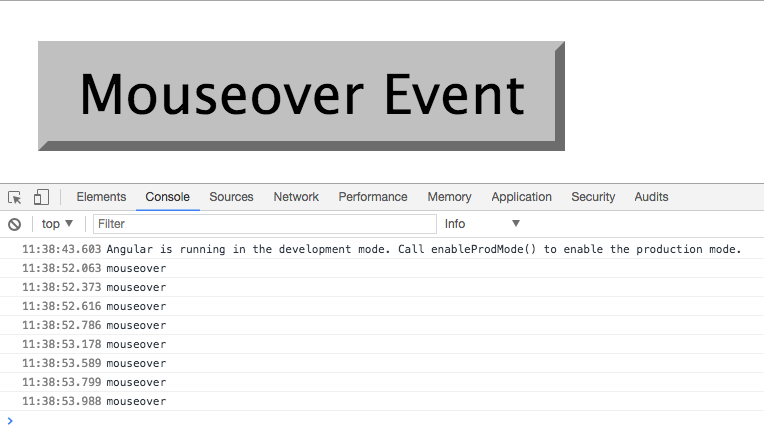
The following screenshot shows the type of event (mouseover) being outputted to the console every time the cursor hovers over the button.

I’ve got here a handy table with the mouse events you have available to you:
| (click) | Checks for a single click; including the mouse clicking down, and then back up again |
| (mouseover) | Registers when the cursor is over the element on which this attribute is applied |
| (mousedown) | Will register the event when the mouse is clicked down, not needing to wait for the click to release |
| (mouseup) | This event registers when the mouse click is released, so the click down doesn’t need to be done on the element itself |
| (dblclick) | The double click event will register the event when it detects two mouse clicks in a short timeframe |
| (drag) | Will register when the item is dragged |
| (dragover) | Registers the event every time an item is dragged over this element |
If you want to download an example project which demonstrates all of the mouse events, you can do so here:
You can also find information on the mouse events you can use in Vue JS over here:
Last updated: April 16, 2024


