The Magento 2 API allows for a wide range of interfacing with the Magento site through the use of API URLs. In this blog post, I will discuss how the Magento API can be used in conjunction with Ionic/Angular to browse through the products on the Magento e-Commerce website.
A really handy resource for making good use of the Magento 2 API is the list of API routes in the Magento 2 docs, here: http://devdocs.magento.com/guides/v2.0/rest/list.html
In this blog post, I will be making use of the API routes in the ‘Catalog’ section of this REST API list.
All of these API routes need you to append the route to the end of the URL for the Magento site. In this blog post example, I will be interfacing with the API of easho.co.uk (learn about Easho here), so if I wanted to access the ‘Search’ API route, for example, I would do a request to ‘http://www.easho.co.uk/rest/V1/search/’.
Here what I’ll be doing is displaying the data of products in the Magento catalog, and viewing them by their categories. So as for the category part of this, I’ll need to have a page for the categories, and in the controller I would run the API request.
The API request would first need me to import some libraries that will run this API request:
import { Http, Headers, Response, BaseResponseOptions, ResponseOptions } from '@angular/http';After declaring the necessary headers and options, we can now run the first of your API requests, which is a GET request to retrieve all the categories.
To do this, we’ll just do a GET request to /V1/categories. For example, with mine I just run
this.http.get('http://www.easho.co.uk/rest/V1/categories', options)The response of this will give you all of the categories and subcategories on the Magento website. Using this data, we can just display the names of the categories in a list.
So we’ll set the data of the response to an array called categories , and then in the view, I’ll use ionic’s library for the list, and create an ion-list, with the containing ion-item element being repeated for each category.
Example:
<ion-content>
  <ion-list>
    <ion-item-divider>Categories</ion-item-divider>
    <ion-item *ngFor="let category of categories" (click)="viewCategory(category)">
      { { category.name }}
    </ion-item>
  </ion-list>
</ion-content>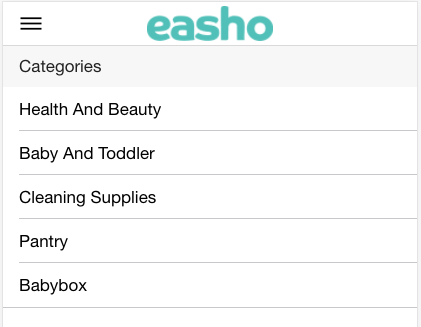
You may notice the click event on the ion-item element. This links to a function called viewCategory, while passing in the category, to either view a subcategory, or to view the list of products, I’ll get onto that later.
This part here has a bit of a branching path, either you create another page to display subcategories if they exist, or you go straight onto listing the products in a category.
I will first go over the subcategory list. First you’d want to create a page for the subcategories and then navigate to it within the function referenced in the click event on the name of the category, while passing in the category.
viewCategory(category) {
      const categoryView = this.modal.create('CategoryPage', { category: category });

      categoryView.present();
  }
In the controller of the newly created page for the category, all you then need to do is get the category from the nav params, and loop over category.children_data in the ion-list, to display subcategories.
<ion-content class="card-background-page">
  <ion-list>
    <ion-item-divider>Sub-Categories</ion-item-divider>
    <ion-item *ngFor="let subcategory of category.children_data" (click)="getProducts(subcategory)">
      { { subcategory.name }}
    </ion-item>
  </ion-list>
</ion-content>
Note that this ion-item element can also has the click events on them to view the product list, which is what I’ll go over next.
When it comes to the product list, this can either be linked to through the initial category list, or the subcategory list. You’d do the same process as the subcategory page, in terms of creating a page, referencing the page, and passing in the category.
viewCategory(category) {
    const productlistView = this.modal.create('ProductListPage', { category: category });

    productlistView.present();
}
Then in the controller of this newly created product list page, we’ll get the category from the navParams, insert the ID of the category into the API route to get all the products that exist within that category, and then store those products in an array, which we’ll call
productList
this.http.get('http://www.easho.co.uk/rest/V1/categories/' + this.category.id + '/products', options)The issue here is that this will only return the SKU of the product, so what needs to be done now is the SKU needs to be used to get the rest of the product data. So we’ll loop through every item within productlist, and run a HTTP GET request to retrieve the product data based on the sku. After doing this, we’ll push the data of each product into an array, which we’ll call productData.
for (let product of this.productlist) {
//getting all details of the product by passing in the sku of each one into the URL
this.http.get(this.apiURL + 'products/' + product.sku + '?pass=1', options)
.subscribe(data => {
//assigning response data to a variable in the format of json
this.productData.push(data.json());
});
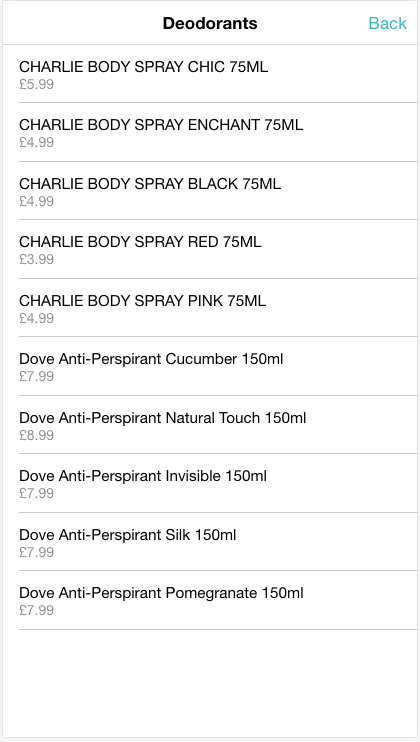
}Now that we have all of the product data, we can now display the products in a list, or in any other way if you so desire. Because we have all the data, all that’s left is to decide how to present it. In my example, I am just displaying the name of the product, and the price, in an ion-list in which you can click on the item to view the rest of the product details, the data of which is also being pulled from the same array as the list.
<ion-list *ngIf="productData">
    <ion-item (click)="viewProduct(product)" *ngFor="let product of productData">
        <span class="product-name">{ { product.name }}</span>
        <p>£{ { product.price | number: '1.2-2' }}</p>
    </ion-item>
</ion-list>
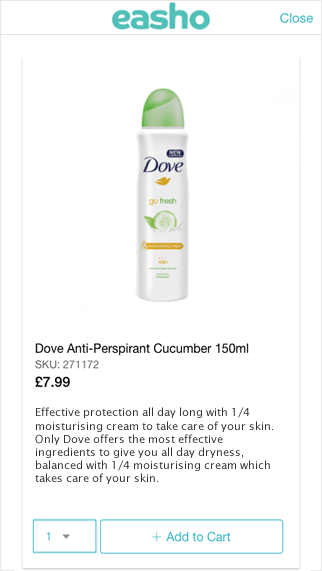
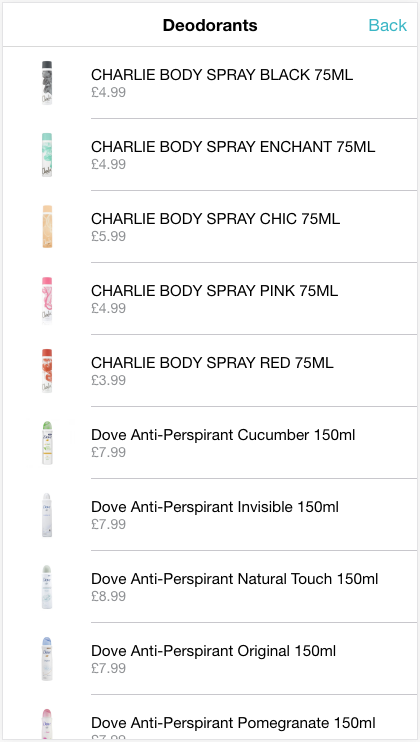
Because the productData array now contains all of the data for a product, I can create a page for a single product that displays much more data than just the name and price. Just from using the API to get a product’s data, I am able to display an image by taking a file name that’s stored in the productData array, and appending it to a URL to get the image to display it. This can also be used to display the product’s image as a thumbnail in the product list.
By using the Magento 2 REST API, the possibilities are endless.
If you enjoyed this article, read our other Learn articles to see more from our Magento developers or browse the site to see what else we do with Adobe Commerce, PunchOut Catalog and more.