


October 11, 2022
When our clients are looking for improved search functionality on their Magento site, our go-to recommendation is Algolia. Their autocomplete search dropdown returns relevant results almost instantly- even when working with millions of products, the base module is easy to integrate and allows you to switch to an improved category view out of the box.
The extensibility of Magento is a crucial factor for it being our eCommerce framework of choice and our clients expect us to utilise this to provide a great experience for all users while ensuring all content fits with their brand. Because of this, we often make changes to the out-the-box functionality and styling to ensure users get the most out of their search efforts.
The Issue
We were recently asked to implement and update Algolia autocomplete for a client on their Magento site implementing the Hyvä theme. This required some additional fields to be indexed into Algolia to be displayed to the user, as well as some alterations to the compatibility module code. In this article, I will go through the process step-by-step for anyone looking to do the same.
In this example, I will be adding the base Magento product attribute “Manufacturer” as its own dropdown section, to allow people to search for their favourite brands as well as products, categories and CMS pages.
How to install Algolia and the Compat Module
If you have Algolia installed and working you can skip this step.
- The first step is to install the Algolia plugin, this can be done via composer with composer require algolia/algoliasearch-magento-2.
- As we are using the Hyva theme we also need to install the Hyva compatibility module. This is done via composer with composer require hyva-themes/magento2-algolia-search.
- Once these are added, run bin/magento setup:upgrade to install and enable the modules. You’ll then need to go onto algolia.com and create an account and create your application.
- Once this is done you can select your application in the dropdown at the top of your dashboard then go into settings > Team and access > API Keys. Copy the API keys over to your Magento admin in Stores > Configuration > Algolia Search > Crenedtials and basic setup. The keys required are Application ID, Search-Only API key and Admin API key.
- Once in place and enabled, Algolia should now be working. In order to retrieve your data (products, categories etc) you will need to ensure indexing is enabled (Stores > Configuration > Algolia Search > Credentials and basic setup > Enable indexing) and reindex the site. Note: If this is in a non-production environment it makes sense to update the index name prefix to represent this so that you can differentiate later on.
- Now all that’s left is to reindex (bin/magento indexer:reindex) Once this is complete you can check in your algolia.com dashboard to confirm that your records are showing and if so, you should be retrieving results when searching on the front-end
Adding Additional Product data
To add additional product data, the first step is to go into Stores > Configuration > Algolia Search > Products and confirm that the attribute you want to add is included in the Attributes list. Algolia includes some standard Magento 2 product attributes anyway so the manufacturer is included already, but if you are adding a custom attribute you will need to include it here.
Next, go to Stores > Configuration > Algolia Search > Instant Search Results Page, add your attribute to the Facets list if it isn’t already included, and Save.
Now go to Stores > Configuration > Algolia Search > Autocomplete > Additional Sections and click add. Select the attribute you are looking to add. Note: If you gave your attribute a custom “Label” in the previous section this is what you will need to look for in the dropdown. Add your attribute and Save.
Rendering
Next, you will need to copy the autocompleteConfig.js file to tell it you wish to render this as its own separate section. Copy the contents of vendor/hyva-themes/magento2-algolia-search/src/view/frontend/web/js/internals/autocompleteConfig.js to the following location:
app/design/frontend/[Vendor]/[theme]/Hyva_AlgoliaSearch/web/js/internals/autocompleteConfig.js
On line 355 of this file, you can see the currently rendered sections.

To add the manufacturer to this, it has to be added as an additional const as per the others, and appended to the HTML rendered section. The finished product should look like this:

Reindex
In order for Algolia to index the additional data correctly, you will now need to reindex again. You can run the following to avoid having to reindex and save time:
bin/magento indexer:reindex algolia_products algolia_additional_sections
Testing on Frontend
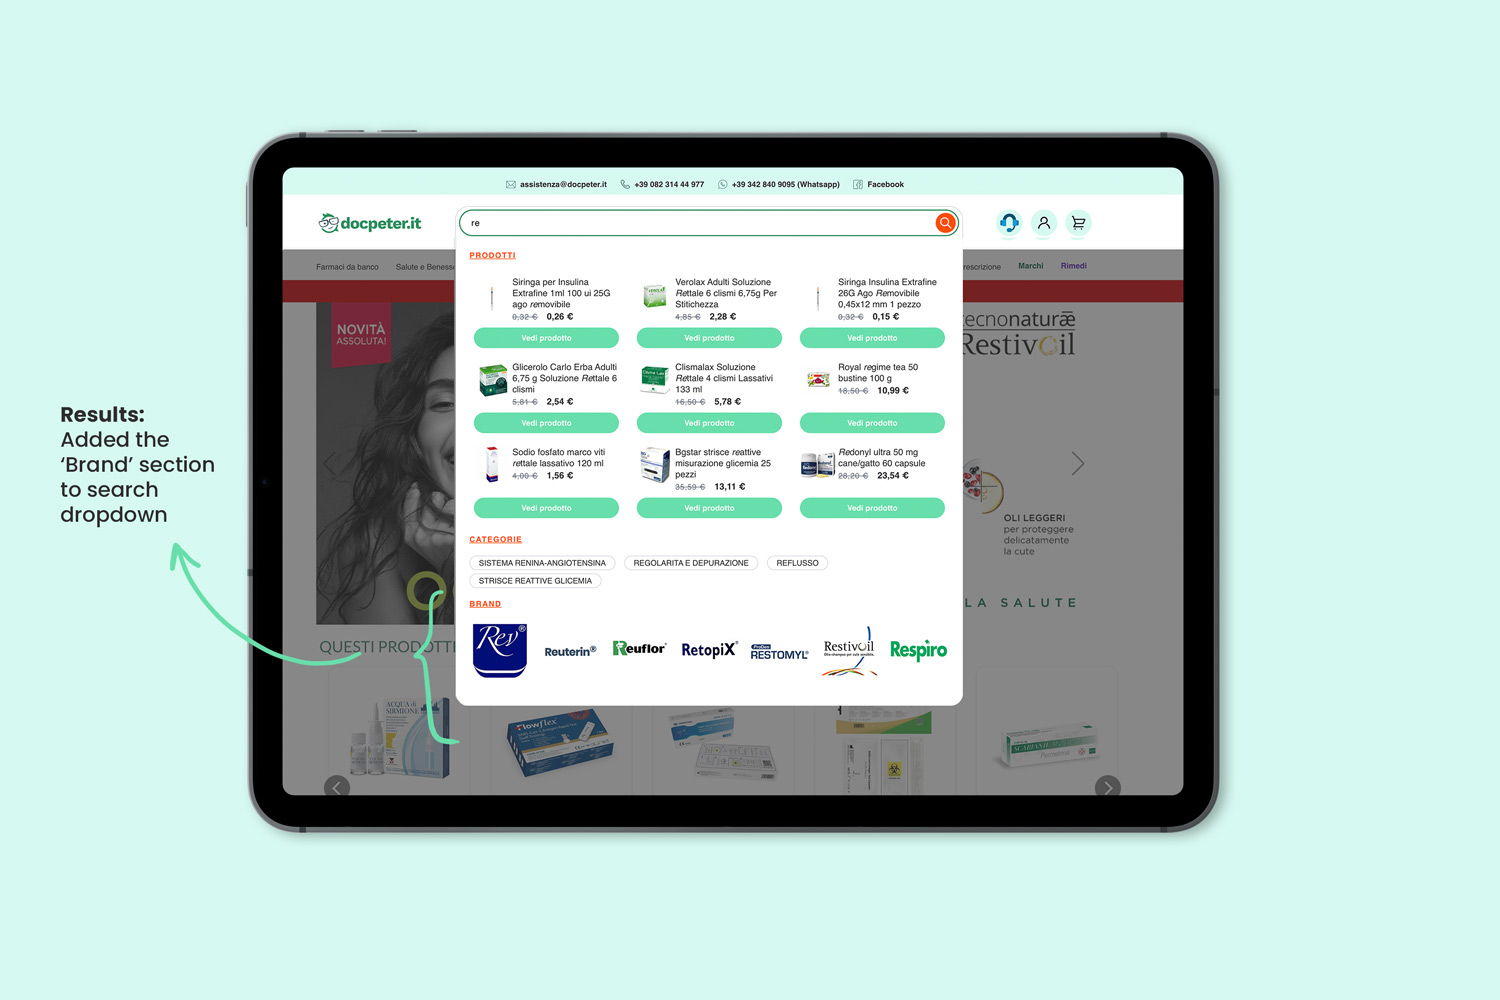
Once this is complete you can test on the front end by searching for a known “manufacturer” (in my case) and you will see an additional section rendered showing any manufacturers which match the search query.
The Results
This code was used on a client's site, the 'Brand' section was added to the search dropdown on our client's site, optimising search results for customers.
You can read another Algolia case study here.
Develo is a leading Magento agency and ecommerce web development company based in Birmingham, in the UK, serving clients globally since 2010. We provide our Learn articles to share knowledge of magento development, web app development and more to the wider web developer community. To extend your team with our white label web developers, get Hyvä development advice, get a Magento Punchout catalogue set up or consult with us on your project contact us here.
Last updated: November 11, 2024